Charcuterie Board Styling-Easy and Pretty
This post may contain affiliate links. Please read my Privacy Policy.
Charcuterie board styling is an easy way to serve appetizers and decorate your table, all at the same time! Therefore, it’s the perfect colorful and tasty addition to your table when hosting a party or dinner for large groups.
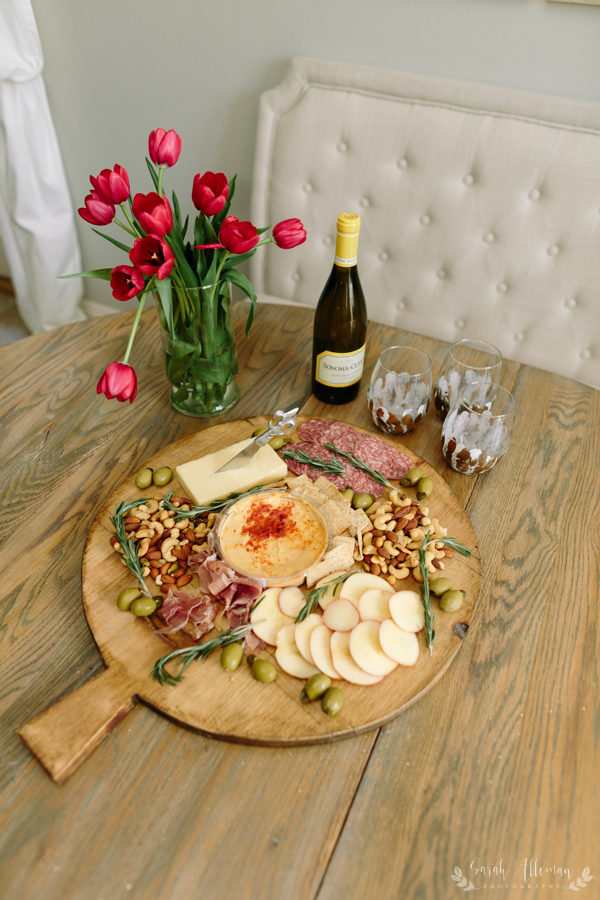
Charcuterie board styling can replace a centerpiece for your kitchen table instead of having to purchase flowers. I love the way my new charcuterie board looks in our newly updated kitchen nook. In addition, here’s a quick blast from the past! Do you remember the gorgeous charcuterie boards from that photoshoot I styled for Sallie Bynum Art? Don’t worry, if you missed that post you can see it by clicking here. The girls at Five Seasons Cooking did an amazing job with those!
WHERE TO PURCHASE A CHARCUTERIE BOARD
I highly recommend Purveyor Home. They have a GREAT selection of charcuterie boards in several different shapes and sizes. Also, they are sold at affordable prices! Charcuterie boards can get pretty expensive, especially the larger sizes. However, I would not pay a lot of money for one when there are great deals out there like at Purveyor Home. Oh, and great news! If you are not local, they ship everywhere! Just message them on Instagram and they will hook you up!
WHAT YOU WILL NEED TO STYLE A CHARCUTERIE BOARD
- Block of cheese . It can be any type, choose your favorite!
- Nuts. Similarly, choose your favorite! They can be a mix or a single type
- Olives
- Humus
- Fruit or vegetable. For instance, I chose apple slices because they are crisp and don’t make a mess. Carrots, cherry tomatoes, grapes, and celery sticks work too!
- Crackers
- Atleast 2 types of meat. I like to use pepperoni, salami, and/or prosciutto
- Rosemary to garnish
In conclusion, make it easy on yourself and try to use what you already have first, then go out and purchase what you still need! Above all, there are no strict rules for styling a charcuterie board so have fun with it!
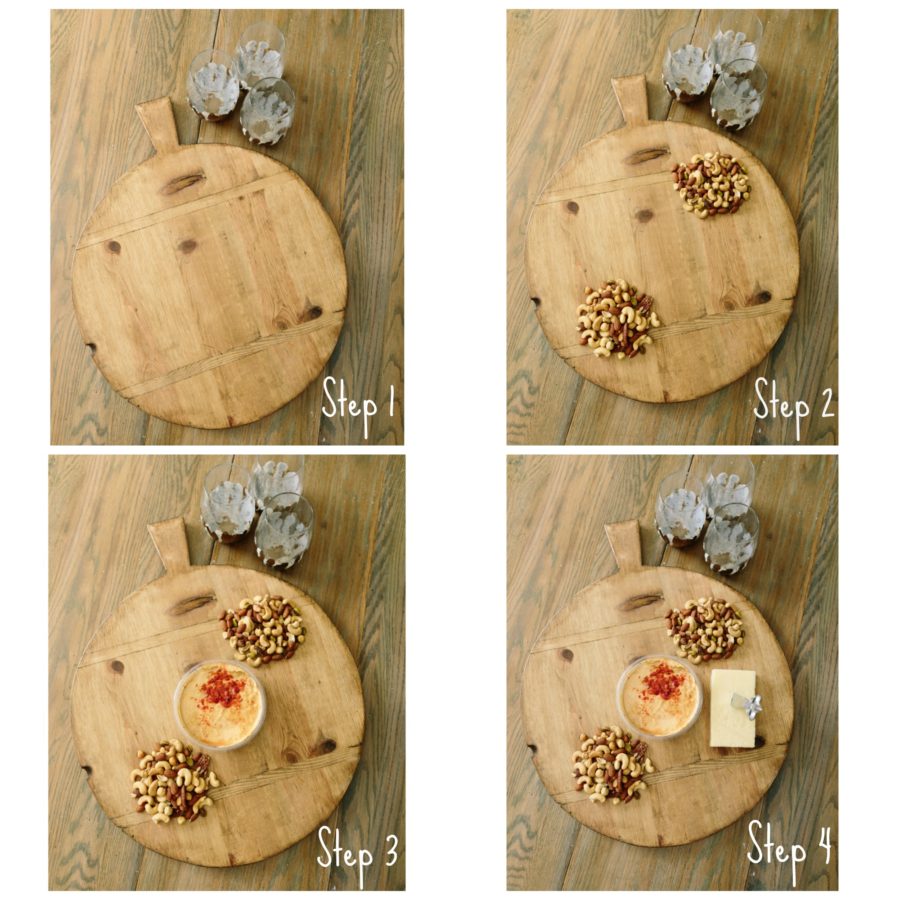
HOW TO STYLE A CHARCUTERIE BOARD: STEPS 1-4
- Step 1- Placement
- Place your charcuterie board in the spot where you plan to serve the food. Because, after styling all of your ingredients, you will not want to move it!
- Step 2-Nuts
- Start by taking 2 handfuls of nuts and placing them in 2 nice even piles, opposite one another on the board.
- Step 3- Hummus
- Remove the lid and the label from your hummus container. Then, place the container in the center to anchor the board.
- Step 4-Cheese
- Take the block of cheese from its wrapper and place it in one of the blank spaces next to the hummus. After that, stick a decorative cheese knife in the block of cheese for easy serving and a little character. I’ve linked 3 of my favorite cheese knives here…
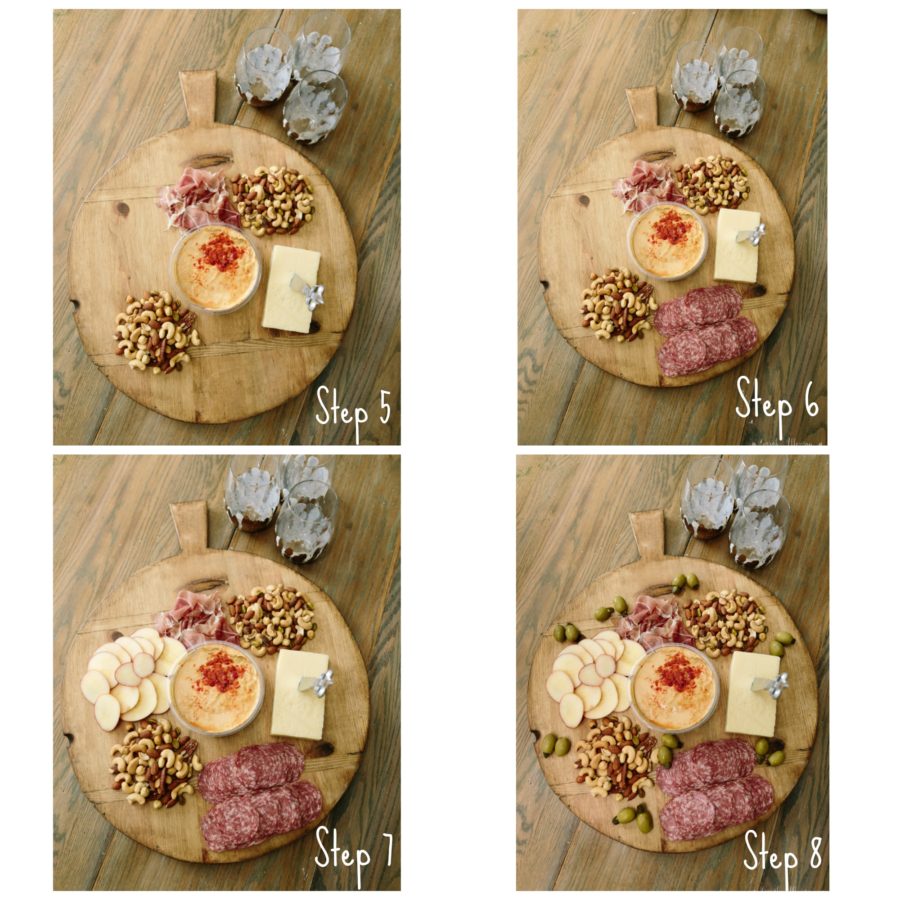
HOW TO STYLE A CHARCUTERIE BOARD: STEPS 5-8 continued
- Step 5- Meat #1
- Place one of your meats next to the nuts in a nice organized manner
- Step 6- Meat #2
- Set this meat opposite of meat #1 in one of the blank spaces
- Step 7- Fruits/Vegetables
- Scatter in your fruits and vegetables in the remaining spaces in an organized manner. However, keep all fruits that are alike together and all vegetables that are alike together
- Step 8- Olives
- Sprinkle olives around the the perimeter of the board, filing in blank spaces.
HOW TO STYLE A CHARCUTERIE BOARD: STEPS 9-10 continued
- Step 9-Rosemary
- Garnish the remaining spaces with springs of rosemary. In addition, feel free to break apart or cut the springs to fit necessary spaces.
- Step 10- Crackers
- Place a handful of crackers wherever you have space left. I like to put mine in between the hummus and the meat, using the meat as a barrier to hold the crackers in place. In other words, I save the crackers for last because the other ingredients serve as borders around them to keep the crackers from sliding all over the board.
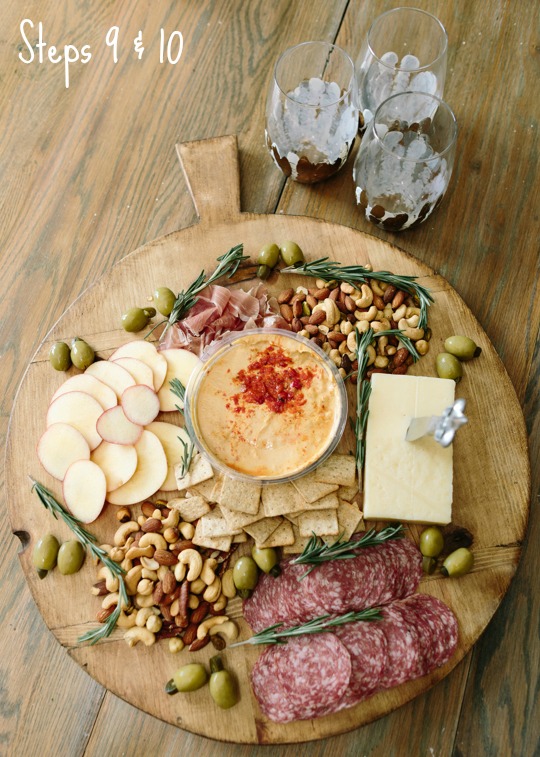
And tada! You now have a beautifully styled charcuterie board ready to feed your guests and add warmth and color to your table….
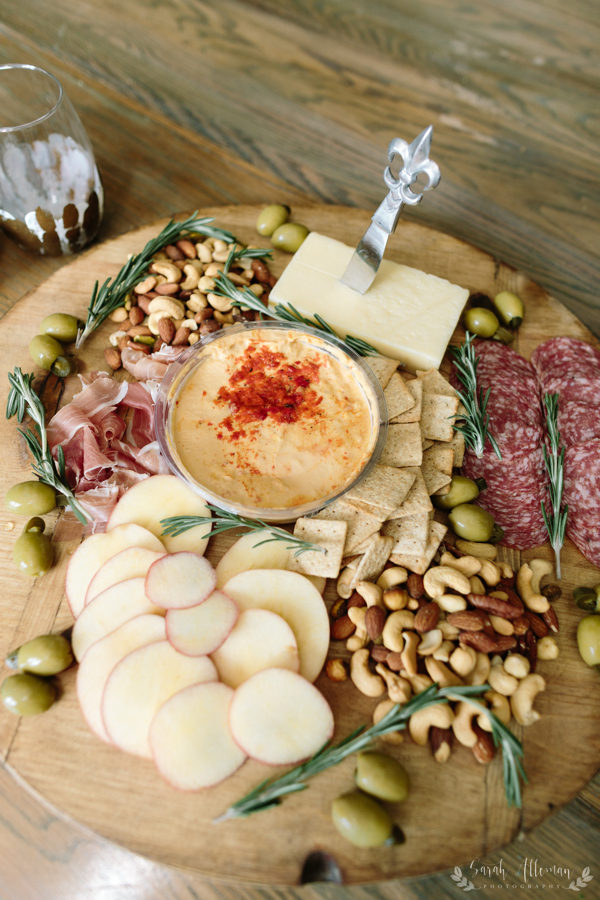
In conclusion, I plan to serve up a few of these charcuterie boards this Fall and Winter during football and hunting season! Imagine all the happy boys/men when they see fresh food sitting out all the time!
Speaking of Fall, I’ll be back soon with some fun Fall projects and DIY’s I’ve been working on!
In the mean time, if you are looking for some early Fall inspiration? Click here to see my Fall decor from last year.
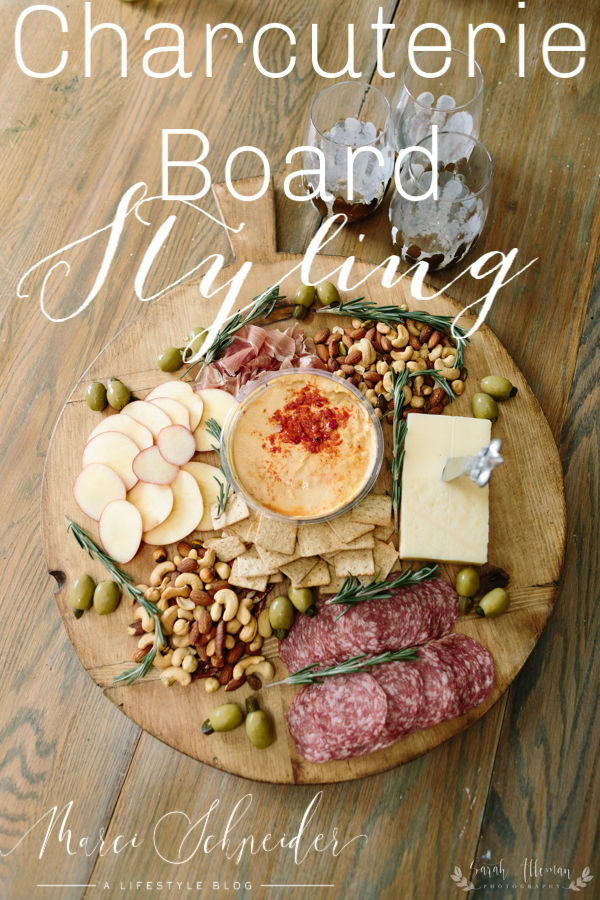
Additionally, if you’d like to save the link for easy access to the steps above, hover your mouse over the photo below and pin it to your favorite board on Pinterest.
One Comment
Comments are closed.